After installing your Recast Management Server, you'll need to assign roles to users and configure a Recast Proxy to manage tasks.
Assign Roles to Users
Add an Active Directory User or User Group in RMS
To add an AD user or user group:
1. In your Recast Management Server, navigate to Administration > Permissions.
2. In the Recast Users section, click Add User or Add Group.
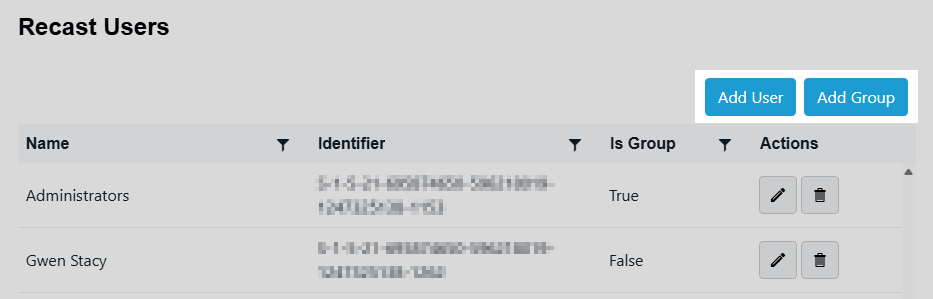
3. In the window that opens, search for your AD name or AD user group and click the Add button.
- Search is limited to the users or groups in the same domain as your Recast Management Server.
- Search looks to match the user logon name (SamAccountName) not the display name.
Use a wildcard (*) to facilitate your search
Wildcard examples:John Connor returns strings that match exactly
John C* returns strings beginning with 'John C', such as 'John Connor', 'John Connors', and 'John Cranston'
*Connor returns strings ending with 'Connor', such as 'John Connor' and 'Carol O'Connor'
*Support* returns strings that include 'Support' plus whatever is on the left and right, such as 'Customer Support Team' and 'Enterprise Support Group'
Assign a User or Group a Role
Each user or user group must be assigned at least one role.
To assign a user a role:
1. On the Permissions page, click the Edit icon to the right of the user or group.
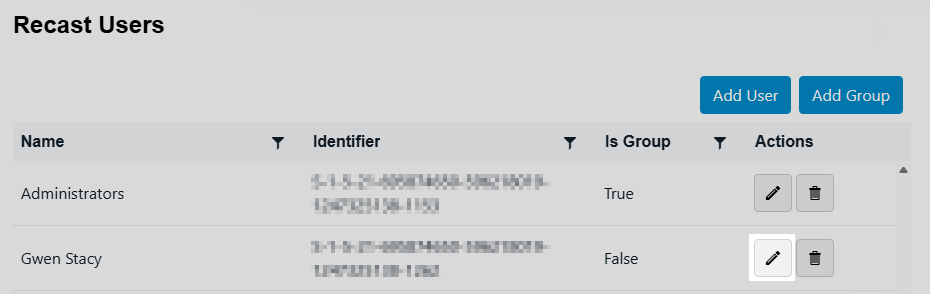
2. In the Role Assignments window that opens, under Roles, select a role to assign to the user/group.
To learn about the individual permissions granted by a role, see View or Edit User Role Permissions.
3. Under Assigned Roles, enable Limit this user to specific objects and select a Service Connection to add a limiting rule that restricts user permissions to a set of devices (optional). To learn more, see Limiting Rules.

4. Click Save.
NOTE: Beginning with Recast Software Version 5.9.2502.2105, you no longer have to set a Refresh Interval to repopulate your limiting rules (formerly known as scopes). The scheduled Discovery Sync will keep your service connection data up to date.
NOTE: For Patching, the user account running the Recast Proxy requires the TaskScheduler > StartTaskByName permission in RMS prior to running the initial setup. You can grant the permission using the default Administrator role, or by a creating custom role.
Configure a Recast Proxy to Manage Tasks
A Recast Proxy can be used to manage a number of tasks within Right Click Tools, such as allowing access to web dashboards, scheduling Recast Builder actions and Kiosk Manager actions. You'll also require a Recast Proxy to collect warranty information with Insights.
To set up a proxy to manage tasks, you must authorize the proxy in the Recast Management Server (if necessary), create a Recast Proxy route, order the routes to match your priorities, and add service connections.
Authorize a Recast Proxy
By default, the Recast Management Server automatically authorizes any proxy installed in the same domain as the Recast Management Server. Proxies installed in other domains must be approved manually, unless you've edited the default setting to approve all proxies automatically.
Create a Recast Proxy Route
To create a Recast Proxy route:
1. On the Routes page in your Recast Management Server, click Create.
2. In the Create Route window, set the route Type to 'Recast Proxy'.
3. Select your proxy computer name with service account from the drop-down.
4. Set the Role to 'Administrators'.
5. Click Submit.

Reorder Routes
By default, new routes appear at the bottom of the table on the Routes page.
- To make actions run using a Recast Proxy route that is lower in the list, you must move that route above the Console Extension route in the table, as the first route to be successfully matched will be used.
- If you only need your proxy to populate limiting rules, and you don't want to run any actions using that proxy, you can leave your proxy route at the bottom of the table.
Changes to the route order are saved automatically.
Add Service Connections
Add service connections in your Recast Management Server so that the Recast Proxy can query the third-party services.
Service Connection Types:
- ActiveDirectory: Required for Right Click Tools web dashboards
- AzureActiveDirectory (Entra ID): Required for Privileged Access and the Entra ID BitLocker Recovery Keys tool
- MEMCM (Microsoft Endpoint Manager Configuration Manager): Required for Patching and Right Click Tools web dashboards
- MBAM (Microsoft BitLocker Administration and Monitoring): Optional for BitLocker web dashboard
To add a service connection:
1. On the Service Connections page, click Add Service Connection.
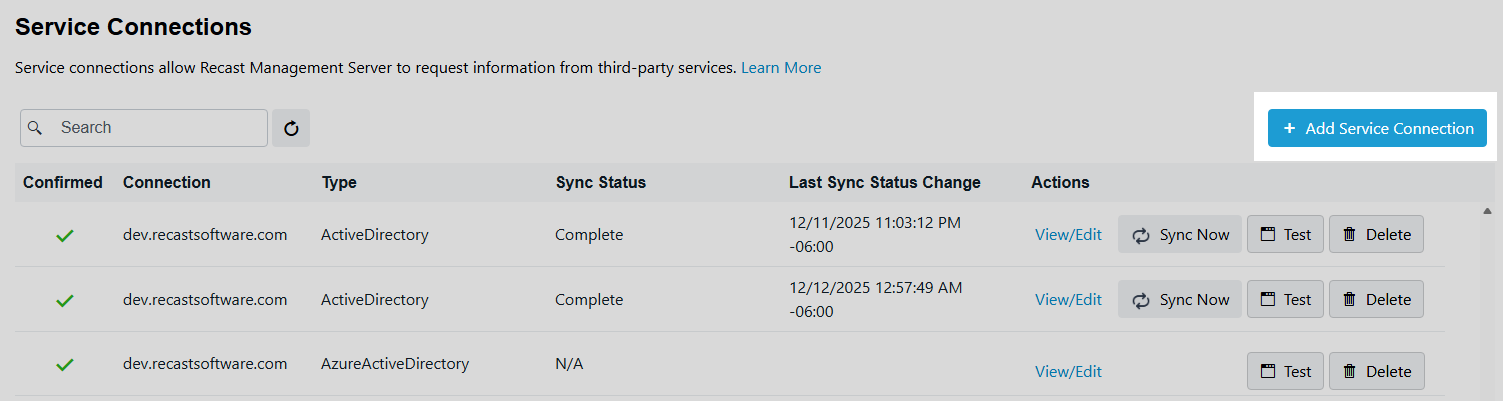
2. In the Create New Connection window, select a connection Type: ActiveDirectory, MEMCM, MBAM, AzureActiveDirectory (Entra ID), SMTP.
3. Name the new connection and add details associated with the connection type.
| Service Connection Type | Required Details |
|---|---|
| ActiveDirectory | Domain |
| MEMCM (Configuration Manager) | SMS Provider, Site Code, Database Server, Database |
| MBAM | Admin URI, Database Server, Compliance Status Database, Recovery and Hardware Database |
| AzureActiveDirectory (Entra ID) | Tenant ID, Client ID, Client Secret For RCT Patching: Enable the Use a Recast Proxy to connect option, which overrides Recast Management Server routing |
| SMTP | 'Require SMTP Server Authentication' enabled (default) If not using Recast Proxy account: SMTP Server Username, SMTP Server Password |
4. Select a Proxy Computer Name and Proxy User Name from the drop-down lists, if required.
5. Click the Confirmed check box to ensure that the service connection is available for use.
6. Click Submit.
TIP: You can test the Recast Management Server's connection to third-party services by clicking the Test button on the Service Connections page.
