There are two types of permissions that will allow the Recast Management Server installer to automatically create the SQL database with all the necessary permissions:
- The user account running the installation can be assigned a SysAdmin role in the SQL instance. If the user account has permission to connect remotely, use the Test SQL Connection button to check connectivity to the SQL Server during the install. After the RMS installer creates the database, the SysAdmin permission can be removed. NOTE: Before removing SysAdmin permissions on the newly created database, check that db_owner permissions are granted on the database for the computer account running the Recast Management Server app pool. Add db_owner permissions, if missing. This additional step may only be required for a remote SQL server.
- The computer account of the Recast Management Server can be granted db_creator permissions. In this case, check the Skip SQL Connection Test box on the installer's SQL Configuration page.

Pre-create the RecastManagementServer Database
If the account running the Recast Management Server installer does not have permission to create a SQL database, the database administrator can pre-create a database named RecastManagementServer and assign permissions manually.
Remote SQL Server: Where the database is remote from the Recast Management Server, assign db_owner permissions on the database to the computer account of the Recast Management Server.
Local SQL Server: Where the database is local to the Recast Management Server, assign db_owner permissions on the database to the IIS AppPool\Recast Management Server account.
NOTE: The IIS AppPool\Recast Management Server account will not exist until after the installation is finished, so db_owner permissions will need to be assigned after installation.
Add the Computer Account via SSMS
If the computer account for the Recast Management Server computer does not exist in SQL, users will need to add the computer account manually, as a Login Account in SQL Server Management Studio (SSMS).
Add the Computer Account as a Login Account
To create the computer account as a login account:
1. Open SSMS and expand the folder of the server instance in which you want to create the new login.
2. Right-click on the Security folder, point to New and select Login.
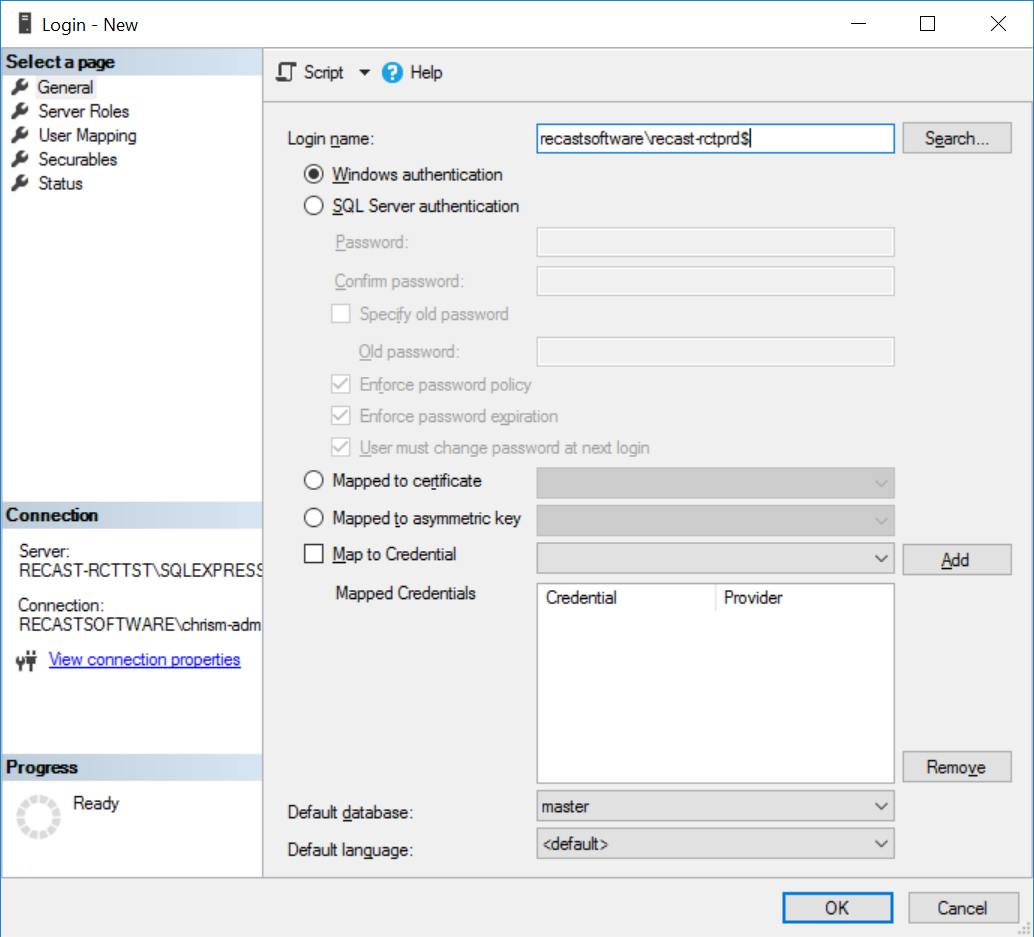
3. In the Login - New window, on the General page, enter the Login name of the account in the following format: <domain name>\<computer name>$. Including the dollar sign ($) treats the login name as a computer account rather than a user account.
4. On the User Mapping page, in the Users mapped to this login section, select RecastManagementServer.
5. In the Database role membership section, select db_owner.
