A Recast Agent Gateway is an on-premises component that connects your Recast Management Server to your Recast Agents. An Agent Gateway lets you to manage your endpoints at scale by providing a secure communications path for:
- Agent authentication and authorization
- Agent licensing
- Directing Recast actions to Agents
- Extending Agent connectivity to the Internet
- Connecting Agents with other Recast components
Multiple Agent Gateways can be added, meaning that there's no limit to the number of Agents that can connect to your Recast Management Server. Internet-connected devices that are not on your local network can connect to the Agent Gateway, allowing you to run Recast actions against them, without the need for a Cloud Management Gateway (CMG).
NOTE: One Agent Gateway is required for every 20K Recast Agents deployed.
The Recast Agent Gateways page in RMS displays details related to your Agent Gateways. By default, the one Agent Gateway added automatically during Recast Management Server installation is listed.
NOTE: You can view the Agent Gateway to which a specific Agent is connected on the Agents page.

Recast Agent Gateway details and actions:
- Computer Name
- Connected: Shows whether the Agent Gateway is connected to your Recast Management Server.
NOTE: Recast Agents must enroll with the Recast Management Server before they can communicate with an Agent Gateway and be used to run actions. See Deploy Recast Agents.
- Version: Agent Gateway software version
- Authorized: Shows whether an agent gateway is authorized to connect to your Recast Management Server.
- Actions
- Edit Agent Gateway details or authorize an Agent Gateway. To manually authorize an Agent Gateway, click the Edit icon to the right of the Agent to authorize. In the Edit window, enable the Authorized checkbox and click Update.
- Delete an Agent Gateway by clicking the Delete icon to the right of an Agent Gateway and confirming the deletion.
A single Agent Gateway is automatically deployed and authorized when you install Recast Management Server. You can also install additional Agent Gateways, to accommodate all of your Recast Agents. Each Agent Gateway must be installed on a different server.
Run the Agent Gateway Installer
After downloading the Recast Agent Gateway software from the Recast Customer Portal, run the installer and follow its prompts.
IIS
To configure IIS:
1. On the IIS Configuration page, specify the Server Name in FQDN format (server.domain.local).
2. Set the IIS Port. The default IIS Port is TCP 444, to prevent conflicts when Recast Management Server is installed on Configuration Manager servers. The IIS Port can be changed to 443, or any open TCP port, to suit your environment.

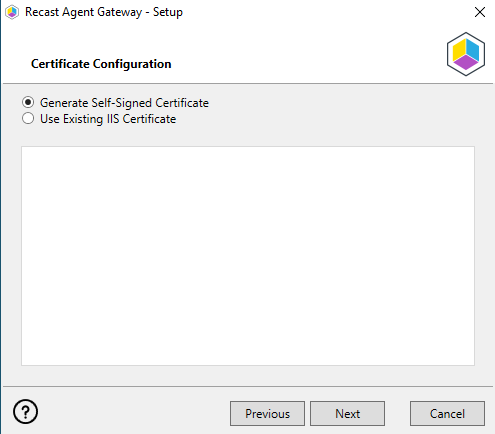
Certificates
To configure a certificate:
On the Certificate Configuration page, we recommend that you Use an Existing IIS Certificate issued by a trusted Certificate Authority (CA). If you choose to Generate a Self-Signed Certificate, you must import the Recast Management Server self-signed certificate to the Trusted Root Certificate Authorities store on devices running Right Click Tools, Recast Agent, or Recast Proxy.
CERTIFICATE NOTES:
- The certificate subject name (or a subject alternative name) should match the server name in the URL that Right Click Tools and Recast Proxies are pointed toward.
- Right Click Tools will prompt for any untrusted certificates and add them to an allowed list.
- The certificate can be changed later by editing the Binding in IIS Manager.
Recast Management Server Connection
To test the Agent Gateway's connection to your Recast Management Server:
1. On the Recast Management Server Configuration page, click Test Connection.

2. After a successful connection test, click Install.
3. When the installation completes, click Finish to close the installer.
Verify Agent Gateway Installation
In the Recast Management Server interface, navigate to Administration > Agent Gateways and check that the new Agent Gateway is connected and authorized. If you've installed an Agent Gateway on a separate server, you may need to manually authorize it in RMS.
For information on the hardware needed for Agent Gateway servers, see Recast Management Server System Requirements.
To learn more about installing your Recast Management Server with an additional Gateway, see Network Architecture: RMS with Standalone Agent Gateway.
The Agent Gateway SQLite file is located at C:\Users\Recast Agent Gateway\AppData\Roaming\Recast Software\Recast Agent Gateway
You can extend Recast Agent connectivity to devices that are not on your local network by publishing Recast Agent Gateway to the Internet. One method of publishing Agent Gateway to the Internet is to use the Microsoft Entra Application Proxy service. You can find App Proxy requirements and more information in this Microsoft Entra ID Tutorial.
For more detail about this configuration of Recast Software components, see Network Architecture: RMS with Standalone Agent Gateway.
Prerequisites
You must have an additional Agent Gateway installed on a separate server.
- This server must be Internet-connected and able to communicate with your Recast Management Server.
- If you're having issues with a self-signed certificate, you can use an http connection by adding an http connection type under Internet Information Services (IIS) Manager > Sites > Bindings. For details, see How to add binding information to a site.
Connect the Agent Gateway to the Internet
To connect an Agent Gateway to the Internet using the Azure App Proxy service:
1. In the Microsoft Azure portal, under Enterprise Applications, click New application.
2. Click Create your own application.
3. In the Create your own application panel, enter Recast Agent Gateway as the name of the application.
4. Select Configure Application Proxy for secure remote access to an on-premises application.
5. Click Create.

5. Click Download Application Proxy Connector then click Accept terms & Download.
6. After installing the Application Proxy Connector on your Agent Gateway server, click I've finished the installation.
7. Configure Application Proxy settings on the Basic tab:
- Name: Recast Agent Gateway
- Internal Url:
- Your Agent Gateway server address and port
- If you're having issues with a self-signed certificate, use http
- External Url: Address to set as the Gateway address when deploying Recast Agents
- Pre Authentication: Select Passthrough
Deploy Recast Agent to the Agent Gateway
You can now deploy the Recast Agent application and connect it to the Internet-connected Agent Gateway. The App Proxy Agent Gateway port is always 443.
Example:
msiexec.exe /i "Recast Agent.msi" /qn /norestart RCTENTERPRISESERVER="https://RMS.RecastDomain.com:444"
AGENTGATEWAY="https://recastgw-tenant.msappproxy.net:443"NOTE: Installing Recast Agent for the first time requires a Recast Management Server connection.
When you install an Agent Gateway on a separate server, you'll need to manually authorize it in the Recast Management Server interface.
To manually authorize an Agent Gateway:
1. On the Recast Agent Gateway page, click the Edit icon to the right of the agent you want to authorize.
2. In the Edit window, enable the Authorized checkbox and click Update.

