In complex environments where actions can run via the Recast Agent, Recast Proxy, and the ConfigMgr Fast Channel, the audit log can be a great help in determining how actions are being routed in your environment.
You can find these logs in your Recast Management Server by clicking Administration > Audit Log.
The audit log contains information on when an action was run, who ran the action, the plugin that the action is a part of, which action was run, and the execution time. 
Click Proxies to see the device the proxy is running on, and which service account ran the action.

Proxy Types include:
- Recast Proxy - This means the action was run by a Recast Proxy using the Service Account under which the proxy is running. This corresponds to the Route Type for the Service Account.
- Right Click Tools - This means that the action was run from the computer running the ConfigMgr console as the user who was logged into the console. This corresponds to the Route Type of Right Click Tools.
If you are attempting to run actions over a Recast Proxy but 'Right Click Tools' appears as the Type, check your routes and limiting rules to make sure that actions are being routed correctly.
If the Recast Proxy fails to populate in Recast Management Server, the agent.sqlite file has most likely been corrupted.
Resolution
To recreate the agent.sqlite file:
1. Open Services.
2. Stop the Recast Proxy Service.

3. Delete the agent.sqlite or RecastProxy.sqlite (version 5.x) file from C:\Users\<Proxy Username>\AppData\Roaming\Recast Software\Recast Proxy.

4. Start the Recast Proxy Service (This will recreate the agent.sqlite or RecastProxy.sqlite file).

5. Confirm the proxy populates and shows as Connected and Authorized on the Recast Proxies page in Recast Management Server.
To update your service account or password:
1. Open Services on the device where the proxy is installed.
2. Right-click Recast Proxy Service and select Properties.
3. On the Log On tab, update the account or password and click Apply.
4. Restart the Recast Proxy Service.
When installing a Recast Proxy, there is occasionally a problem generating the Security Support Provider Interface (SSPI) context, which means that SSPI tries but fails to use Windows authentication to delegate client credentials to SQL Server.
The following error message may appear in the Recast Proxy installer's ConfigMgr Configuration window:
'The target principal name is incorrect. Cannot generate SSPI context.'
Probable Cause
In most cases, the problem is that the Service Principal Name (SPN) isn't properly configured.
Troubleshooting Steps
- Check that the SMS Provider, Site Code, SQL Server, and SQL Database details are correct
- Check that the Service Principal Name (SPN) is configured correctly
- Follow the troubleshooting steps in Microsoft's article: "Cannot generate SSPI context" error when using Windows authentication to connect SQL Server.
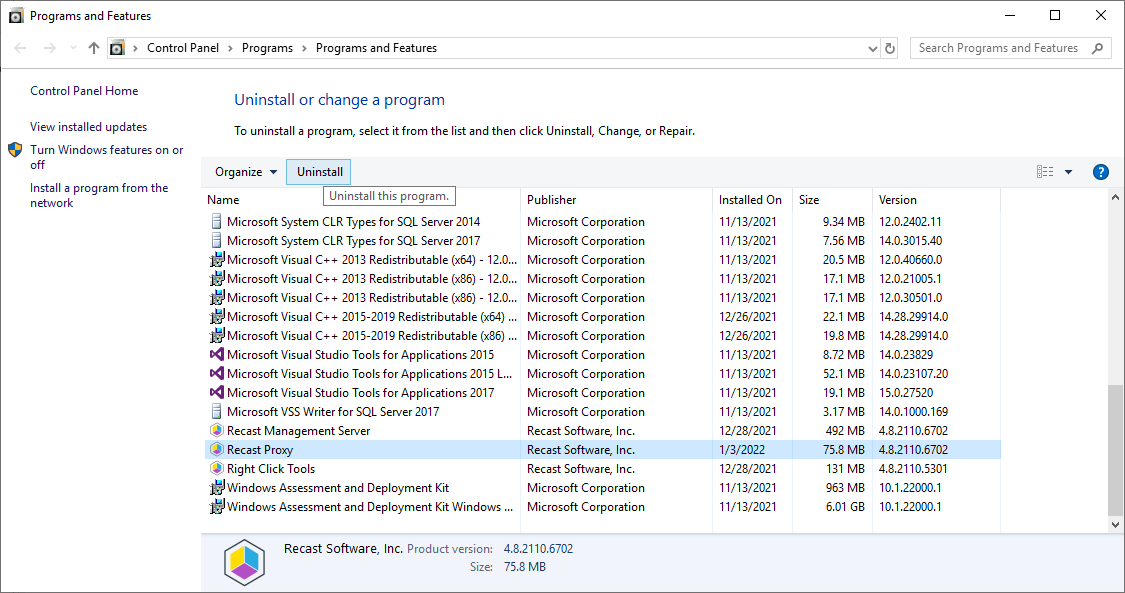
To uninstall Recast Proxy:
1. Open Programs and Features and click to highlight Recast Proxy in the list.
2. Click Uninstall.

3. To confirm the removal, click Yes.
4. Click Yes again, if prompted, to allow the app to make changes to your device.
5. Manually delete the %AppData%\Recast Software\Recast Proxy\agent.sqlite file for the service account.
If you are experiencing issues uninstalling Recast Management Server, you can use Microsoft's uninstaller tool to fully uninstall any lingering files. To download the tool, see Fix problems that block programs from being installed or removed.
