Indications
Menu items aren't displayed in the Recast Management Server navigation panel when RMS is opened.

Cause
This issue is caused by the inability to authenticate properly to the RMS SQL Database. When you first log into the Recast Management Server, it will try to use your Windows credentials to log into the webpage. If you installed RMS with a different account than is signed into windows, this can cause it not to authenticate properly.
Resolution
Open a private browser and navigate to the RMS webpage. It will prompt for a username and password. Make sure to sign in with the same user account that was used to run the RMS installer.
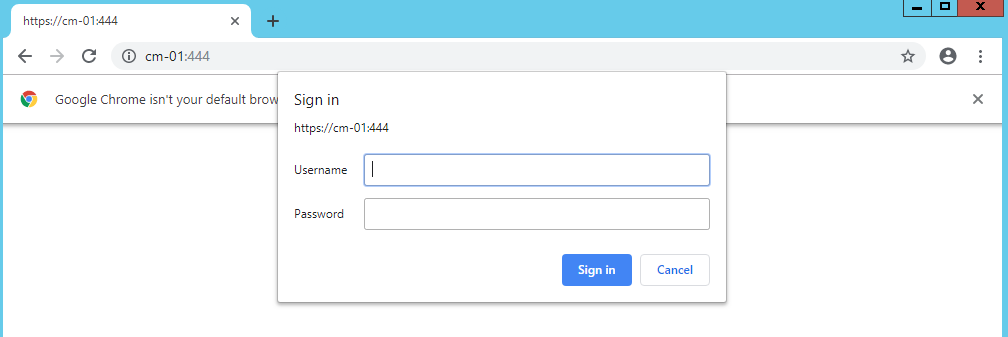
After you are authenticated successfully, you should see the RMS interface. Navigate to the Permissions page and make sure you see Administrators in the Recast Roles section.
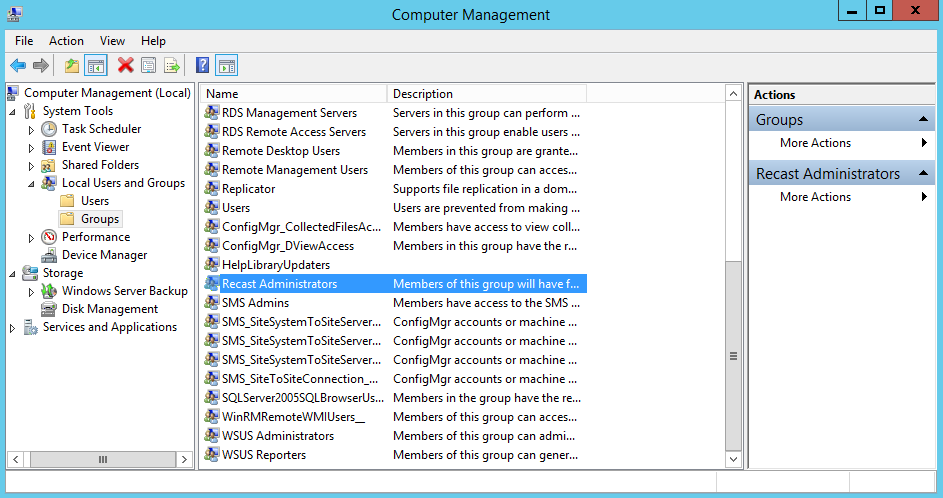
If you are unable to use the installation username to run the browser, you can alternatively add your currently logged in username to the local group on the computer where you installed RMS called “Recast Administrators.” After you add your username to that local group and refresh your browser, the Recast Management Server should allow you to log in using that username and should show the Administrators group (and you will know you are authenticated successfully.)
If you are already logging in with that user and the Permissions page still doesn’t display Administrators in the Recast Roles section, open the IIS manager on the Recast Management Server and recycle the app pool.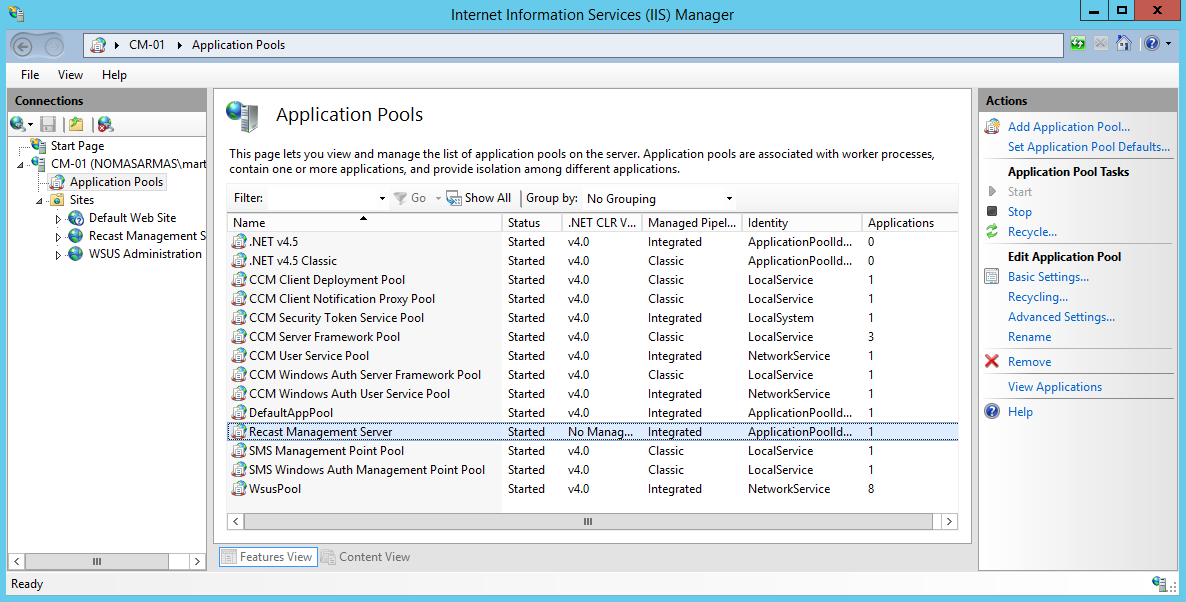
Once you have been successfully logged into RMS, add any users that you want to be able to log into the server in the Recast Users section. Make sure they are assigned to a role that has at least some Administration privileges so they are able to use the Recast Management Server.
When the Recast Management Server (RMS) is first installed, the account that runs the installer is added to the Recast Administrators local group. This allows for authenticating in the webpage for the first time. This group only allows the account to be an admin in the Recast Management Server interface and grants no other admin privileges. This can be helpful in situations where the former RMS admin may have left the company and no one else can log in.
User accounts still need to be added in RMS under Administration > Permissions > Recast Users and given a Recast role.
Error Message: HTTP Error 500.19 - Internal Server Error
Potential Causes
- The IIS Web Core is missing or out of date
- WSUS is installed on the same box as Recast Management Server and is installing a 64-bit version, but not the 32-bit version, of the DynamicCompressionModule
Resolution
When the IIS Web Core is missing or out of date
Do the following:
1. Uninstall Recast Management Server.
2. Uninstall IIS.
3. Delete Recast Management Server and Recast Proxy security identifiers (SIDs) from the Registry.
4. Delete all Recast Management Server and Recast Proxy installers from the Registry.
5. Reinstall IIS.
6. Reinstall Recast Management Server.
7. Download the newest .NET Windows Core Hosting Bundle.
When WSUS has installed a 64-bit version the DynamicCompressionModule but not the 32-bit version
Do any of the following:
- Disable the XPress compression scheme for all pages and application pools
- Disable loading the XPress module for 32-bit application pools
- Install the 32-bit version of the XPress module
To disable XPress compression for all pages and application pools, run the following command to disable XPress compression globally:
%windir%\system32\inetsrv\appcmd.exe set config -section:system.webServer/httpCompression /-[name='xpress']To disable XPress for 32-bit application pools, edit the C:\Windows\System32\inetsrv\config\ApplicationHost.config file and add the following line in the section:
<scheme name="xpress" doStaticCompression="false" doDynamicCompression="true" dll="C:\Program Files\Update Services\WebServices\suscomp.dll" staticCompressionLevel="10" dynamicCompressionLevel="0" />To install the 32-bit version of suscomp.dll, install WSUS on a 32-bit machine and copy the suscomp.dll file from that machine to %windir%\SYSWOW64\inetsrv\.
Error Message: HTTP Error 500.30 - ASP.NET Core app failed to start
Error 500.30 can be caused by remnants left behind after uninstalling Recast Management Server, even when using Microsoft's Program Install and Uninstall troubleshooter tool.
Resolution
Remove the following if they remain in place after uninstalling Recast Management Server:
- RMS user folder under C:\Users
- Registry Key with an RMS security identifier (SID) found at Computer\HKEY_LOCAL_MACHINE\SOFTWARE\Microsoft\Windows NT\CurrentVersion\ProfileList
Error Message: HTTP Error 500.31 - Failed to load ASP.NET Core runtime.
This error may be caused by a version mismatch between .NET Core components.
To troubleshoot this error, check that your .NET Windows Core Hosting Bundle version and ASP.NET Core version match.
If the .NET Windows Core Hosting Bundle version and the ASP.NET Core version do not match, downgrade or upgrade one of the components so that they are running the same version.
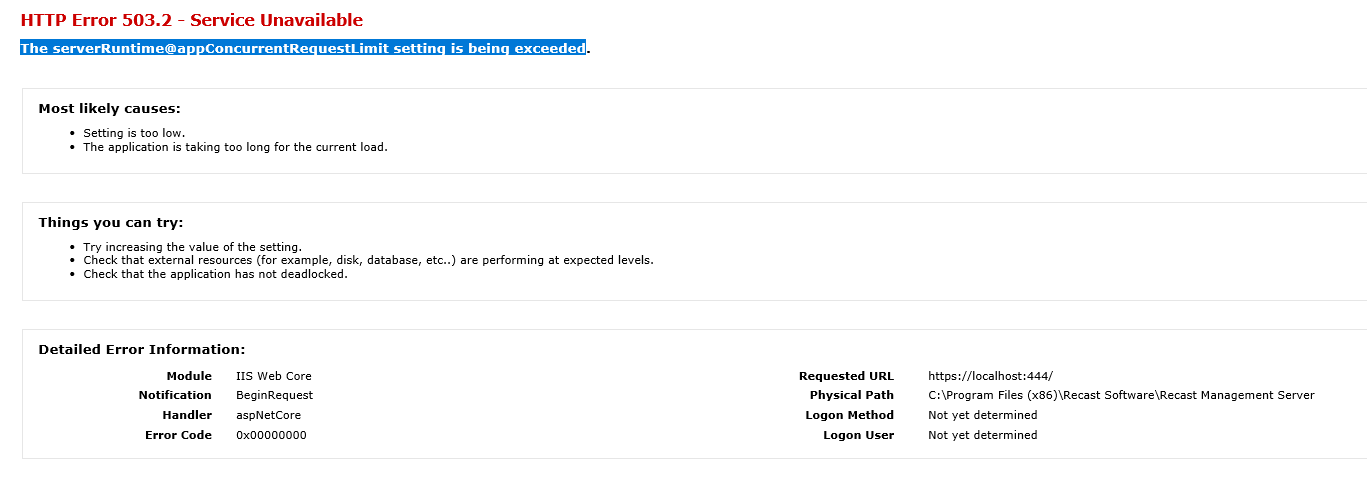
Error message: HTTP Error 503.2 - Service Unavailable. The serverRuntime@appConcurrentRequestLimit setting is being exceeded.
Indications
- When you try to go to the Recast Management Server interface, you get a page saying there's a 503.2 Error.
- When you attempt to use the Right Click Tools, you will get an error saying that the tools were unable to connect to the Recast Management Server.
Probable Cause
This error usually occurs when too many endpoints are trying to connect to a server. The default limit is 5,000 concurrent connections. If you have more than 5,000 Recast Agents, you might come across this error.
Resolution
You can resolve the error by increasing the number of concurrent connections allowed.
To increase the concurrent connection limit:
1. Open IIS Manager and navigate to Sites > Recast Management Server.
2. Under Management, click Configuration Editor.
3. Navigate to system.webServer and select serverRuntime.
4. Change the appConcurrentRequestLimit to a higher value. We recommend increasing the value above the current number of Agents in your environment to provide a sufficient buffer, in case you add more later.
