You can manually enable .NET version 8 via Server Manager.
To enable the required .NET framework:
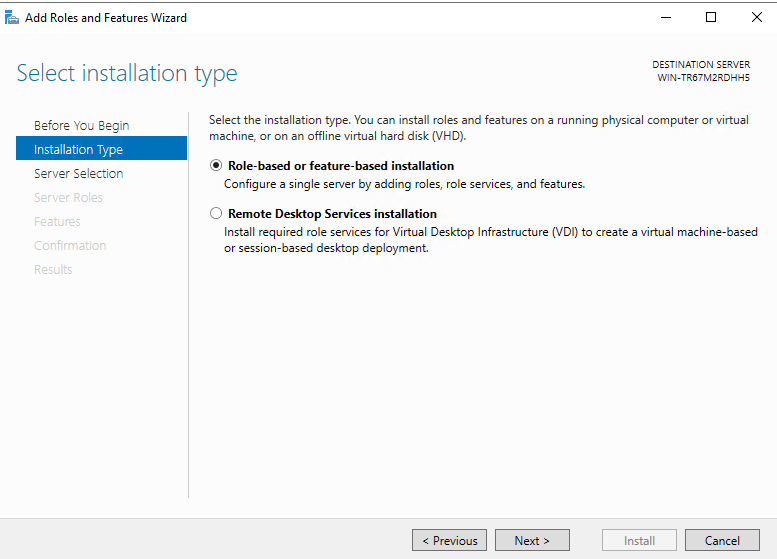
1. Open Server Manager and navigate to Manage > Add Roles and Features.
2. When the Add Roles and Features Wizard opens, click Next.

3. Select Role-based or feature-based installation and click Next.
4. Select your destination server and click Next.

5. On the Select server roles page, click Next.
6. On the Select features page, select .NET Framework > .NET Framework 8.x and click Next.
7. Confirm your installation selections and click Install.
The Recast Management Server requires IIS, which should be installed automatically during Recast Management Server installation. Otherwise, you can enable IIS manually in Server Manager.
To manually enable IIS, if necessary:
1. Open Server Manager and navigate to Manage > Add Roles and Features.
2. When the Add Roles and Features Wizard opens, click Next.
3. Select Role-based or feature-based installation and click Next.

4. Select your destination server and click Next.
5. In Server Roles, click Web Server (IIS). Click Add Features.

6. Confirm that Web Server (IIS) is selected and click Next.
7. On the Web Server Role (IIS) page, click Next.
8. When the Role Services page opens, click Next. (The default settings are fine for our install.)

 9. Confirm your installation selections and click Install.
Installing SQL is an optional step that can be skipped if you have a separate SQL instance that you will be using for your Recast Management Server database.
SQLExpress is used in these instructions for demonstration purposes. It can serve as a temporary database at the Proof-Of-Concept stage, but its limited size will not support web dashboard and dashboard trends in a Recast Management Server deployment. The steps for installing and configuring a licensed version of SQL will be similar.
To install SQLExpress:
1. Download SQLExpress from Microsoft. When you begin installation, you will be presented with the installation type screen. Select Basic installation.
2. Accept the SQL Server License Terms.
3. Choose the install location and click Install.
4. After installation completes, we recommend that you install SQL Server Management Studio (SSMS). To download SSMS from the Microsoft site, see Download SQL Server Management Studio (SSMS).
To change the network configuration:
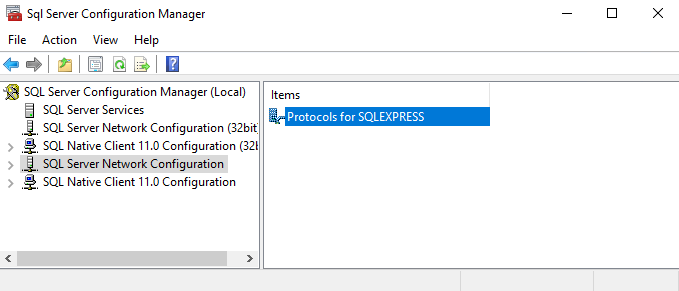
1. Open SQL Server Configuration Manager.
2. Select SQL Server Network Configuration and double-click on Protocols for SQL Express.
3. Select TCP/IP.
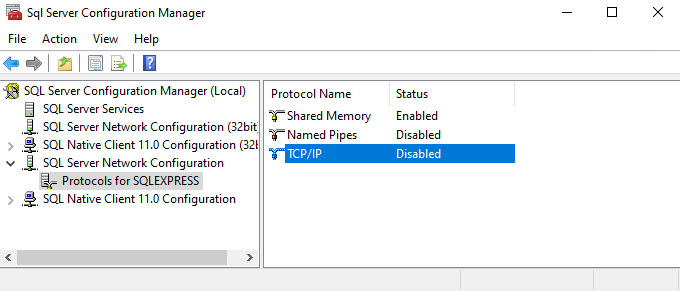
4. Change Enabled to 'Yes'.
5. Select the IP Addresses tab and scroll down to the IPAll section. 
6. Add port 1433 as the TCP Port (this is the standard port for SQL).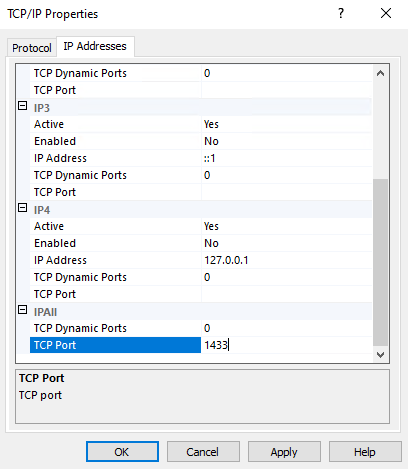
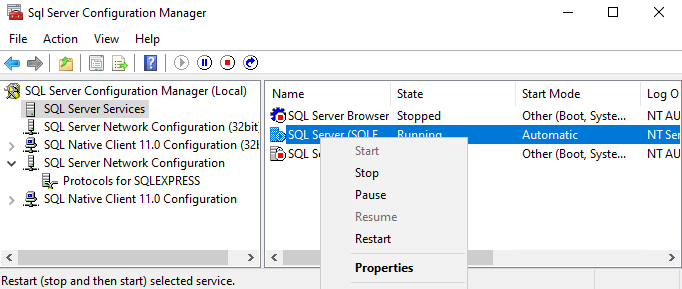
7. You will need to stop and restart the service for changes to take effect. Return to the front page of the SQL Server Configuration Manager and right-click on the running SQL server instance. Select Restart.
You are now ready to install the Recast Management Server.
To install Recast Management Server:
After downloading Recast Management Server from the Recast Portal, open the installer by double-clicking on the .msi file.
When the Recast Management Server Setup Wizard opens, click Next.
IIS
To configure IIS:
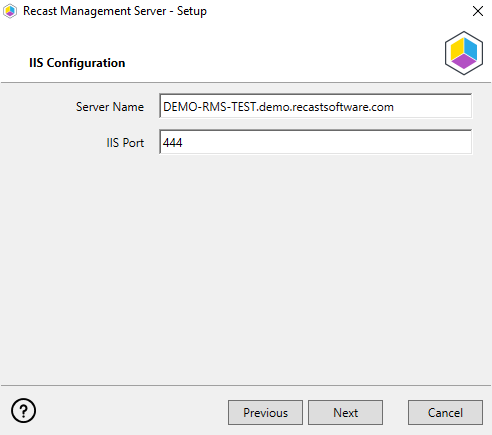
1. On the IIS Configuration page, change the Server Name only if the client is going to use a DNS alias.
2. Set the IIS Port. The default IIS Port is TCP 444, to prevent conflicts when Recast Management Server is installed on Configuration Manager servers. The IIS Port can be changed to 443, or any open TCP port, to suit your environment.
Certificates
Recast Management Server requires a certificate for secure communication with Right Click Tools and any Recast Proxies.
To configure a certificate:
On the Certificate Configuration page, we recommend that you Use an Existing IIS Certificate issued by a trusted Certificate Authority (CA). If you choose to Generate a Self-Signed Certificate, you must import the Recast Management Server self-signed certificate to the Trusted Root Certificate Authorities store on devices running Right Click Tools, Recast Agent, or Recast Proxy.

SQL Server
Set the SQL information from the SQL instance we installed earlier. If you used the default information from the install instructions above, your SQL Configuration page will look like the one below. Click Test SQL Connection to verify that you can connect to the SQL installation.

Import License
To download your Enterprise license:
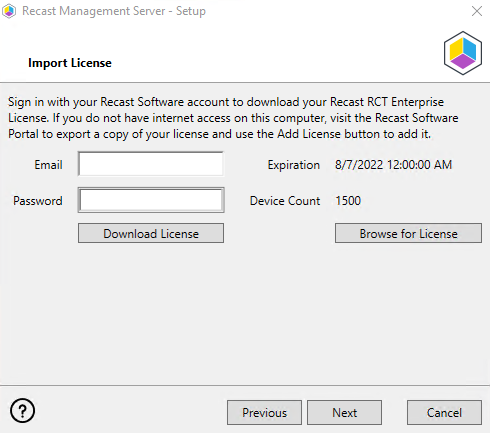
1. On the Import License page, enter your Recast Portal email address and password.
2. Click Download License. The license information will appear in the right-hand column.
NOTE: If your server does not have internet access, click Browse for License to browse the filesystem for a license file that has been exported from the Recast Portal.
Proxy
On the Proxy Configuration page, enter the Service Account information you would like to use for the Recast Proxy. The proxy must be installed for scheduling of Builder/Kiosk Manager actions, to have Right Click Tools actions run as a Service Account, or to access Web Dashboards in the Recast Management Server. It is recommended that you install Recast Proxy during your POC.
The Service Account that you use for the Recast Proxy must have at least full read permissions to Active Directory and Configuration Manager, as well as the ability to read directly from the ConfigMgr SQL database, and the MBAM Database if it exists. See Proxy Service Account Permissions.
To configure the proxy during RMS installation:
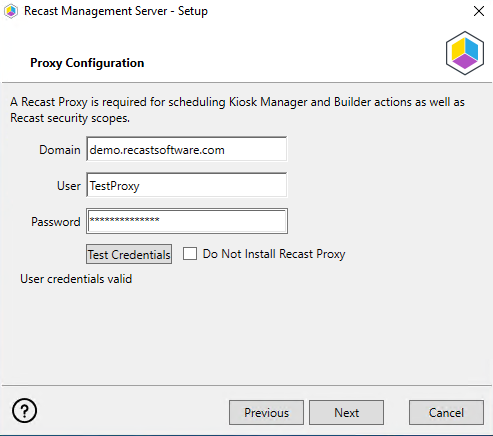
1. On the installer's Proxy Configuration page, enter the service account Domain, Username, and Password.
2. Click Test Credentials to verify service account details.
Domain
To configure your domain:
1. On the Domain Configuration page, enter the Domain Name.
2. Click Test Domain Connection to verify that the service account has access to read from your domain. The test should show Success.

Configuration Manager
Check that your Proxy Service Account has permissions to read from your Configuration Manager installation. Your Service Account must have permission as at least a Read Only Analyst in Configuration Manager, and must be allowed to read from the ConfigMgr Database directly.
To set up Configuration Manager for the proxy:
1. On the Configuration Manager Configuration page, enter the following information:
- Name of the site server that has your SMS Provider role
- Site Code
- Name of the SQL Server where your Configuration Manager SQL database is located
- SQL Database name
NOTE: You can skip the Configuration Manager Configuration page during Recast Management Server or Recast Proxy installation by removing any information from the text fields, selecting Test ConfigMgr Connection and the Skip ConfigMgr Verification checkbox, and clicking Next.
2. Click Test ConfigMgr Connection to check that the service account has access.

For more information, see Manually Configure SQL Server Permissions.
MBAM
Check that your Proxy Service Account has permission to read from the MBAM database. MBAM configuration is only required for a separate MBAM Server. If you are using the ConfigMgr-integrated BitLocker or AD, you can skip this section.
To configure MBAM:
1. Tap Click Here to Configure MBAM.
2. Add your Administration URL and SQL Server information.
3. Click Test MBAM Connection to verify that the service account has access to MBAM.

For more information, see Configure Permissions for the MBAM SQL Database.
Initiate RMS Installation
Once you have filled in all the necessary information, click Install.
When Recast Management Server installation completes, click on the highlighted link to go to the Recast Management Server URL, or click Finish and navigate to your RMS URL at https://<Server URL>:<Port> in a web browser (Chrome, Edge, or Firefox are recommended).
When asked to sign in, enter the username and password for the account used to install the Recast Management Server.
You are now ready to Configure your Recast Management Server.
After installation, you'll need to configure your Recast Management Server. First, log into your Recast Management Server interface using the same account that you used to install the Recast Management Server. Your Recast Management Server can be accessed by navigating to https://<ServerFQDN>:<Port> in a web browser.

When you initially log in, the Recast Management Server homepage will appear.

To add yourself as a user:
1. Expand the Administration section in the navigation panel and select Permissions.
2. In the Recast Users section, click Add User.
3. In the Add User window that opens, enter your user account as the Name and click Search.

4. Click Add to add the user to the Recast Management Server. The user will then appear in the Recast Users section. 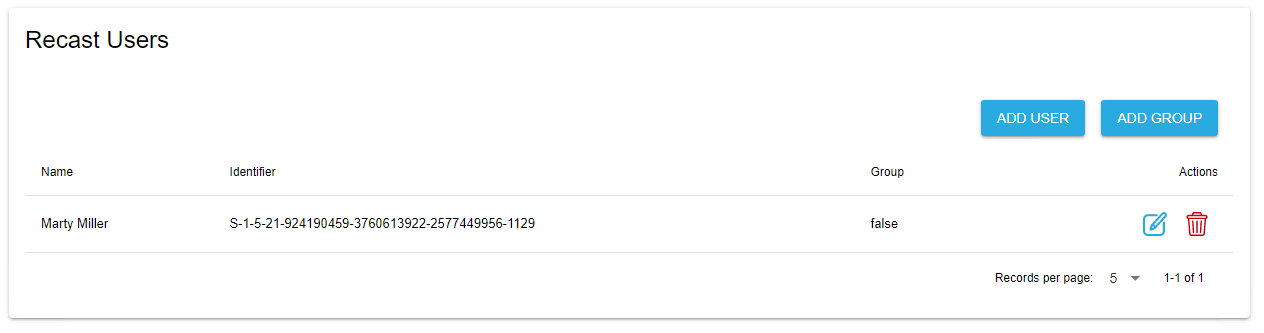
All users must be assigned a role or they will not have permissions within Right Click Tools or the Recast Management Server.
To assign yourself a role:
1. Click on the Edit icon (pencil) to the right of your name.
2. Under Role Assignments, select the Administrators role and click Save.
To check that your proxy is connected to the Recast Management Server:
1. Select Proxies in the navigation panel.
2. Check that the proxy that you installed is showing as 'Connected' and 'Authorized'.

In order to configure the Recast Management Server so that the Recast Proxy can function, you'll need to add a route for the Proxy.
To add a Recast Proxy route:
1. Select Routes in the navigation panel. By default, you should see the Recast Agent and Right Click Tools (Console Extension) routes listed in the table.

2. Click Create.
3. In the Create Route window, set the route Type to Recast Proxy.
4. Select the proxy that was installed on your RMS server.
5. Under Role, select Administrators.
6. Click Create.
Your new route will appear at the bottom of the Routes table. Click to Save this configuration.
Optional Step: If you would like to run actions as the Proxy Service Account, you can drag the Recast Proxy route from the bottom of the list to the top. This will ensure that the action is run as that service account.
You are now ready to install Right Click Tools.
