Recast Management Server software can be installed on its own server or on the primary Configuration Manager server. For a step-by-step visual guide to installing and configuring RMS, see our Recast Management Server Installation Tutorial.
Run the Recast Management Server Installer
After downloading Recast Management Server from the Recast Portal, run the installer and follow its prompts.

IIS
To configure IIS:
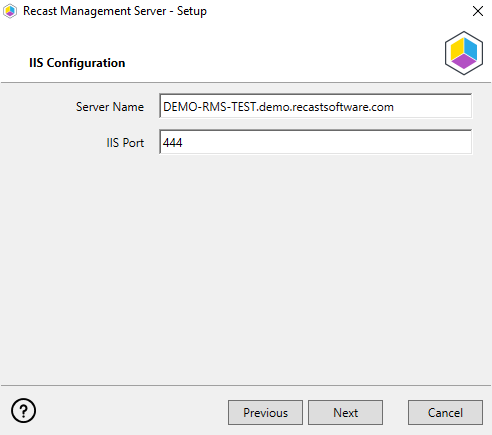
1. On the IIS Configuration page, change the Server Name only if the client is going to use a DNS alias.
2. Set the IIS Port. The default IIS Port is TCP 444, to prevent conflicts when Recast Management Server is installed on Configuration Manager servers. The IIS Port can be changed to 443, or any open TCP port, to suit your environment.
Certificates
Recast Management Server requires a certificate for secure communication with Right Click Tools and any Recast Proxies.
To configure a certificate:
On the Certificate Configuration page, we recommend that you Use an Existing IIS Certificate issued by a trusted Certificate Authority (CA). If you choose to Generate a Self-Signed Certificate, you must import the Recast Management Server self-signed certificate to the Trusted Root Certificate Authorities store on devices running Right Click Tools, Recast Agent, or Recast Proxy.

CERTIFICATE NOTES:
- The certificate subject name (or a subject alternative name) should match the server name in the URL that Right Click Tools and Recast Proxies are pointed toward.
- Right Click Tools will prompt for any untrusted certificates and add them to an allowed list.
- The certificate can be changed later by editing the Binding in IIS Manager.
SQL Server
There are two types of permissions that will allow the Recast Management Server installer to automatically create the SQL database with all the necessary permissions:
- The user account running the installation can be assigned a SysAdmin role in the SQL instance. If the user account has permission to connect remotely, use the Test SQL Connection button to check connectivity to the SQL Server during the install. After the RMS installer creates the database, the SysAdmin permission can be removed.
- The computer account of the Recast Management Server can be granted db_creator permissions. In this case, check the Skip SQL Connection Test box.

SQL SERVER NOTES:
- The default SQL Server Port Number is 1433.
- Recast strongly recommends a fully licensed version of SQL to avoid the 10GB storage limitation of SQLExpress. SQLExpress use is only supported for POC implementations of Right Click Tools.
- After the SQL database is created, set the database recovery model to simple to prevent storage issues.
- Remote SQL Server: The computer account of Recast Management Server will need db_owner permissions to create the database on the remote device. If the account running the Recast Management Server installer does not have permission to create a SQL database, the database administrator can pre-create the RecastManagementServer database and manually give the computer account db_owner permissions.
- Local SQL Server: The IIS AppPool\Recast Management Server account will need db_owner permissions to create the database on the local device. Alternatively, the database administrator can pre-create the database and give the IIS AppPool\Recast Management Server account db_owner permissions to the database. The IIS AppPool\Recast Management Server account will not exist until after the installation completes, so the permissions will need to be given after installation.
Import License
You can download and import your Recast licenses when installing Recast Management Server.
To download your Enterprise license:
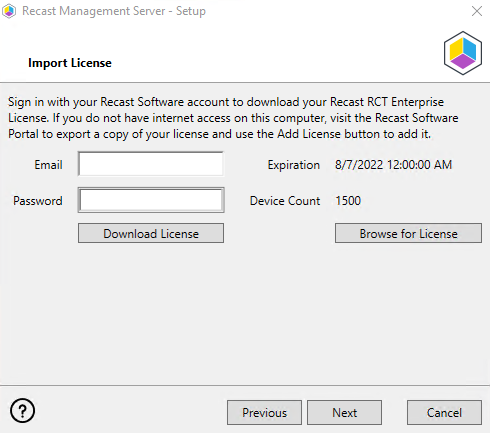
1. On the Import License page, enter your Recast Portal email address and password.
2. Click Download License. The license information will appear in the right-hand column.
NOTE: If your server does not have internet access, click Browse for License to browse the filesystem for a license file that has been exported from the Recast Portal.
Proxy
If the Recast Proxy is being installed on a server other than the Recast Management Server, install the Proxy separately after Recast Management Server installation.
NOTE: Proxy configuration is optional for Privileged Access where Active Directory or Entra ID objects are not used to target rules.
To configure the proxy during RMS installation:
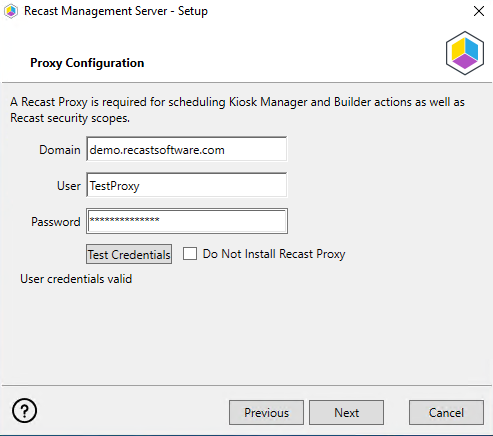
On the installer's Proxy Configuration page, enter the service account Domain, Username, and Password and click Test Credentials to verify service account details.
TIP: If you haven't already set up the required proxy permissions, remove any information from the text fields, select Test ConfigMgr Connection and the Skip ConfigMgr Verification checkbox, and click Next.
Domain
To configure your domain:
1. On the Domain Configuration page, enter the Domain Name.
2. Click Test Domain Connection to verify that the service account has access to read from your domain. The test should show Success.

Configuration Manager
NOTE: Configuration Manager does not need to be set up for Privileged Access.
To set up your Configuration Manager for the proxy:
1. On the Configuration Manager Configuration page, enter the following information:
- Name of the site server that has your SMS Provider role
- Site Code
- Name of the SQL Server where your Configuration Manager SQL database is located
- SQL Database name
NOTE: You can skip the Configuration Manager Configuration page during Recast Management Server or Recast Proxy installation by removing any information from the text fields, selecting Test ConfigMgr Connection and the Skip ConfigMgr Verification checkbox, and clicking Next.
2. Click Test ConfigMgr Connection to check that the service account has access.

MBAM
MBAM configuration is only required for a separate MBAM Server. If you are using the ConfigMgr-integrated BitLocker or AD, you can skip this section. MBAM also does not need to be configured for Privileged Access or Patching.
To configure MBAM:
1. Tap Click Here to Configure MBAM.
2. Add your Administration URL and SQL Server information.
3. Click Test MBAM Connection to verify that the service account has access to MBAM.

Initiate RMS Installation
Once you have filled in all the necessary information, click Install at the bottom of the MBAM Configuration page.
When the installation is complete, open the Recast Management Server by navigating to https://<Server FQDN>:<Port> in a web browser (Chrome, Edge, or Firefox are recommended).
When asked to sign in, enter the username and password for the account used to install the Recast Management Server.
Installation Log Location
To check the installation logs for Recast Management Server and Recast Proxy (when installed together), navigate to C:\Users\<user account running the install>\AppData\Local\Temp
NOTE: The log is named something like Recast_Management_Server_2022*****.log
