Target groups refer to the set of devices on which particular Privilege Manager rules are applied. By default, there is one target group that includes all devices. You can also build target groups that direct rules to a broad or narrow subset of devices, or even to a single device. Target groups can be based on Active Directory domains, organization units, groups, and single agents or devices. They can also be built from Azure Active Directory tenants, groups, and single agents or devices.
During your initial Privilege Manager setup, you create target groups by choosing devices. After defining your default Privilege Manager configuration, you can view, add, edit, and delete the target groups that will follow your management rules on the Target Groups page. This is also where you can edit client settings, including passwords, associated with a target group.
To view target groups in your Recast Management Server, navigate to Privilege Manager > Configuration > Target Groups.
The table lists each target group and its priority level. The list is searchable, and can be sorted by table headings. You can also export the list to a CSV file.
Click on a target group that doesn't include all devices to view details about the selected target group.
Details shown:
- Actions available for the target group (edit and/or delete)
- Type of target group (user group or device group)
- Name of groups that belong to the target group
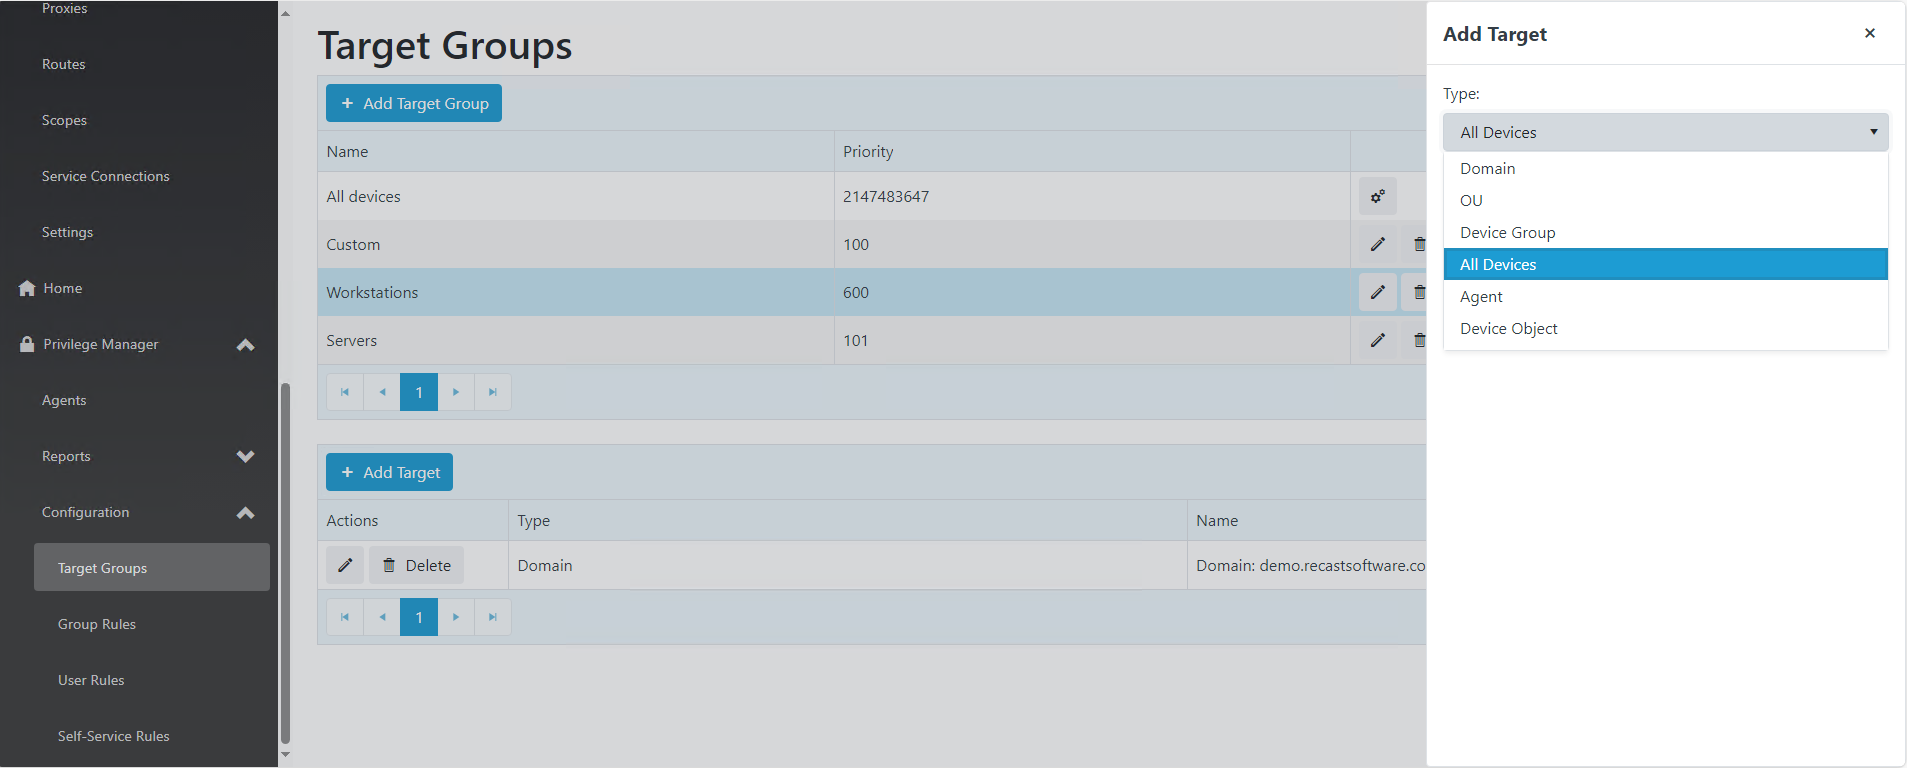
To add a target group, click Add Target Group on the Target Groups page. This is also where you can add a target to the group, and edit or delete targets included in the target group.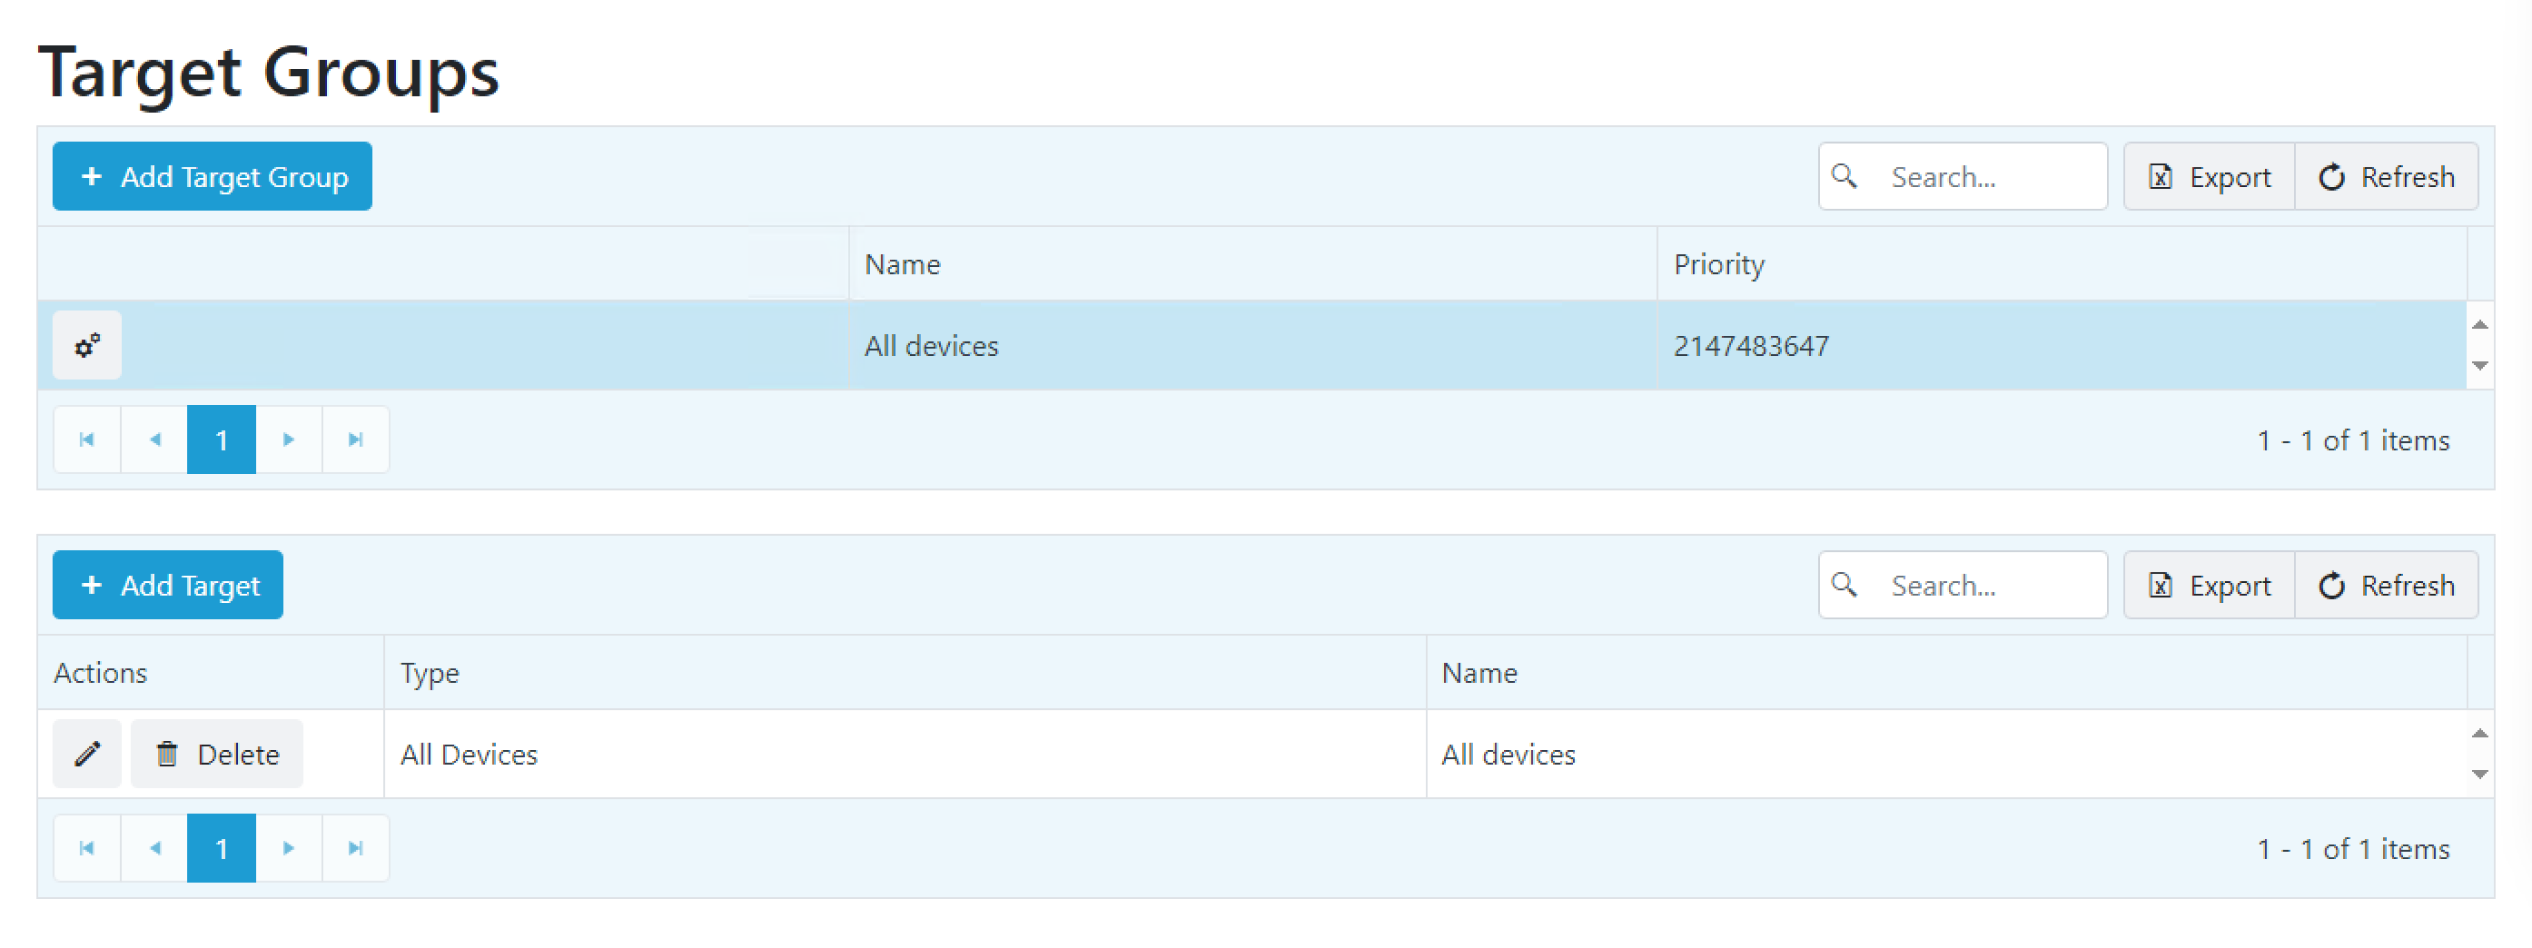
To add or edit Target Group members, click on the Target Group name. You can add members by selecting Add target, edit current members by selecting edit icon, or remove members by selecting Delete.
You can add devices to a Target Group based on their Active Directory Domain, OU, AD or AAD Group membership, or you can add individual devices based on Agent or Device Object name. You can also add all Privilege Manager agents to the Target Group with All devices option.
To edit a target group name and priority, click the Edit icon to the right of a target group name. The default target group that includes all devices cannot be edited.
To delete a target group, click the Delete icon to the right of a target group name and confirm the deletion. The default target group that includes all devices cannot be deleted.
To edit client settings for a target group:
1. On the Target Groups page, click the Settings icon (cogs) to the left of a target group.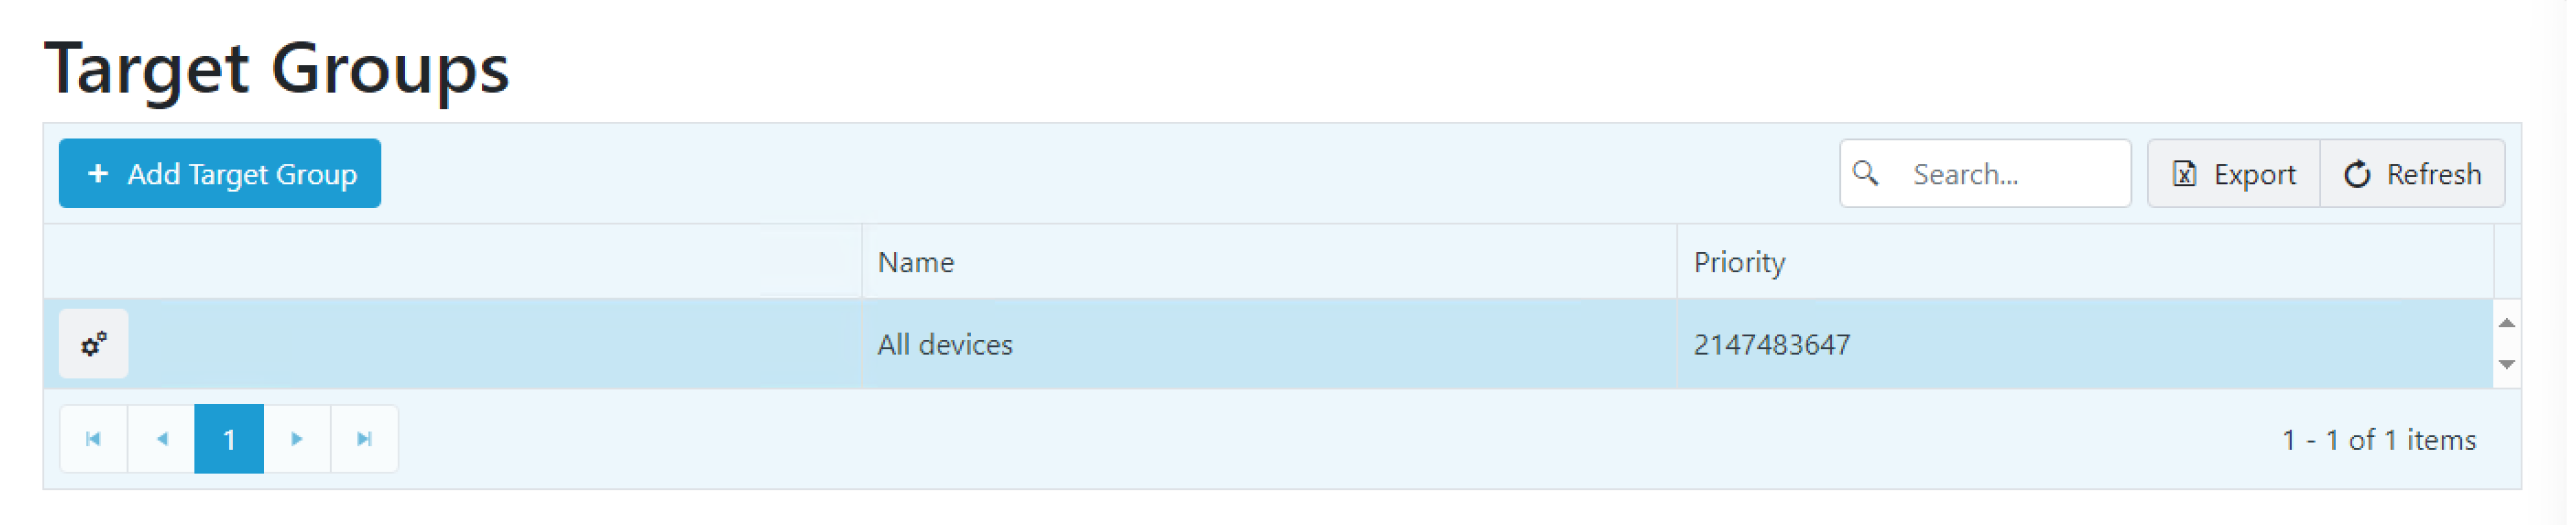
2. In the Edit Client Settings panel that opens, edit General settings, Credential Provider settings, and/or Local Password settings. After making any changes, click Save to update your client settings.
General Settings
- Update settings interval: Sets how frequently the agent attempts to connect to the Agent Gateway to check for new rules. Default interval is 60 minutes.
- Allowed time tolerance: Determines the maximum time difference allowed between the Recast Management Server and the agent before activation fails. Default time tolerance is 10 minutes.
- Manage hybrid devices from Azure Active Directory: Determines whether hybrid joined devices — meaning those joined to both on-premises and Azure Active Directory domains at the same time — will read Privilege Manager configuration targeted to an on-prem AD or Azure AD device object. By default, hybrid devices read PM configuration targeted to an on-prem AD device object.
- Allow processing cached rules in offline: Allows the agent to use rules stored in the local registry if it cannot connect to the Agent Gateway. Enabled by default.
- Allow processing cached rules after update error: Allows the agent to use rules stored in the local registry if the Agent Gateway returns a failure or invalid rules. Enabled by default.
- Require reason category in temporary elevation: When enabled, requires the end user to choose a pre-set reason category for temporary privilege elevation in the Credential Provider on the login screen and/or in the User Account Control window. Enabling this setting also requires those in a Service Desk (or similar) role to choose a reason category when generating activation codes for end users. Disabled by default.
In the Edit Client Settings panel, you can customize the reason categories displayed in the drop-down list by editing, deleting and/or reordering existing category names. You can also click Add Reason to enter an additional category.
Default Categories: Application installation, OS configuration change, Device installation, Security concerns, Troubleshooting
Credential Provider Settings
- Usage scenario:
- Allow 'Use activation code' method
- Allow 'Run with Local Account' method
- Allow 'Run with Domain Account' method
- Default method: Default method is to 'Run with Local Account'
- Timeout: Default is 30 seconds
Local Password Settings
- Characters allowed in passwords
- Length of password: Default is 16 characters
- Re-Generate Interval: Default is to re-generate passwords every 7 days
After making any changes, click Save to update your client settings.